Sunday, March 31, 2013

First Shoot make-up Pictures


 Naomi worked on the rappers bite mark while I was trying to get Ken's bite mark to stay on his neck


There were many cameras on the scene, it was a bit unnerving 


After running to get a blow drier from my dorm, I stood trying to get the latex to dry for a good 10 minutes

Face all scratched up!

Homeless man was last on the list, it didn't take very long, just making him pale and hollowing out the cheeks and eyes, and then at the scene, I applied the blood so it wouldn't make a mess in anyone's car, and it would be nice and fresh for the shoot!

Thursday, March 28, 2013

Header

I finished the header for the blog, I don't know if someone else is working on one too that they might go with, but this is my interpretation.
full image, I figured Ben could apply any effects necessary for the appearance of the blog.

And I cropped it to approximate header dimensions for our blog, but again its up to the blog designer

Job shift!

So for today when we went to the warehouse to finish up the shoot, our previous behind the scenes photographer had to step in as the homeless man when Brad left, so I stepped in as the behind the scenes photographer! and now I have pictures to put on my blog!
make-shift 3 minute homeless man

Rich explaining the fight scene between Ken homeless man

Explaining the rap scene


About to shoot!

reason why I didn't want to bring my camera the first day, I would only be in the way

practice kick

homeless man in position!

Watching the final footage!

Karl interviewing Rich, and it seems the project is finally coming to a close

Sadly, I still have no pictures from last week of the final make-ups, I'm continuously bothering my team members to hand over the pictures! Hopefully I will have them by tuesday

I'm also working on a heading for our group blog with our group name, I was just going to put something together in illustrator so our blog can be complete!
I will post that as soon as I'm done.

Monday, March 25, 2013

Project update

Unfortunately I did not bring my camera with me because I knew there would be enough documentation of everything and assumed I would only be in the way, however I now have no pictures to post of my blog!

I emailed the documentation crew and none of them have gotten back to me as of now, but I will be sure to post them if I get them in before 8 am


I learned a lot from the just hour I was working with Naomi, I applied pieces, which were very stubborn and would not stick with the adhesive she was using, so I built up the edges with liquid latex and then had to run back to my dorm for a hair drier because it refused to dry. Many obstacles had to be overcome in the short hour we had to apply make up. 

Between 2 bite marks, a pale old zombie and a bucket of blood, I think the zombies turned out pretty well and hope they look great on film
I know we need to shoot another day, but not sure if there needs to be a make up day, guess we'll figure that out tomorrow!

If make up is over, now I just get to help out anyone on my team that needs it.


Overall I've really enjoyed the first part of this project, I got to experiment with a lot of make up stuff I hadn't before and feel I learned significantly from it, I would like to explore make-up effects more, even if just as a hobby, I enjoy the goriness of it all and learning how to manipulate the latex, and other household items into something else entirely. I hope to be able to expand on this knowledge and hopefully at least have some fun on Halloween!'

Update: still no email, or even any pictures on the group blog for me to steal, so I will ask for them in person tomorrow, and put them up asap!

Thursday, March 14, 2013

preparation for the shoot!

Shooting is tomorrow!
I made a bucket of blood, with the video Namoi gave me, simple recipe of corn syrup and food coloring


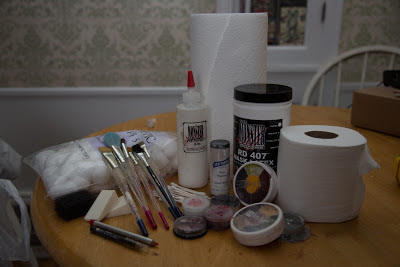
All packed up! I got all my make up, latex, blood, glue and food coloring to adjust coloring in the blood.


I have been assigned with the task of making the homeless man, well, homeless and gross, these are a few example images I found,  my plan is to hollow out the cheeks and eyes, make him look exhausted, I want to exaggerate these example images


 Looking forward to the shoot tomorrow!

Monday, March 11, 2013

updated bite mark

So after talking to Brad it was decided that a zombie bite mark would not heal so I made the adjustments and made it look more like torn flesh being ripped instead of just an imprint
 I was talking to my mom about face off and I can only watch it on Hulu which is 3 weeks behind, but she said that in one of the challenges they used torn up cotton balls to add more of a fleshy texture under the latex, which is what I added here.

As far as all the other make up, it will pretty much be all onsite from here on out, I just made the two bite marks and a bullet wound, but I feel confident that I can do the make up onsite in whatever style the directors decide to go with.

Looking forward to the shoot on Thursday!

Wednesday, March 6, 2013

Bite marks

So I was using this as an example to create my bite mark


And this is what I came up with, however I think its too neat? I'm not sure, but something feels off so I'm still going to tweek it some more


I also made this one to make it look like an older bite, for the homeless man
I'm still unsure on the coloring, or even if the bite would heal on a zombie, but I am just exploring options.


Monday, March 4, 2013

Experimenting

I finally got some liquid latex from the Monster Makers, up in Cleveland


and so far I made the bullet hole
 and I am currently working on bite marks for the zombies
I'm still working on coloring, I'm not sure the direction they want to go it, so I just colored the bullet for the sake of presentation.
I am working on getting in contact with the person they want to bring in so we can collaborate and work together
pictures of bite marks coming soon!